A Darksider Rides Again - 11/04/2012
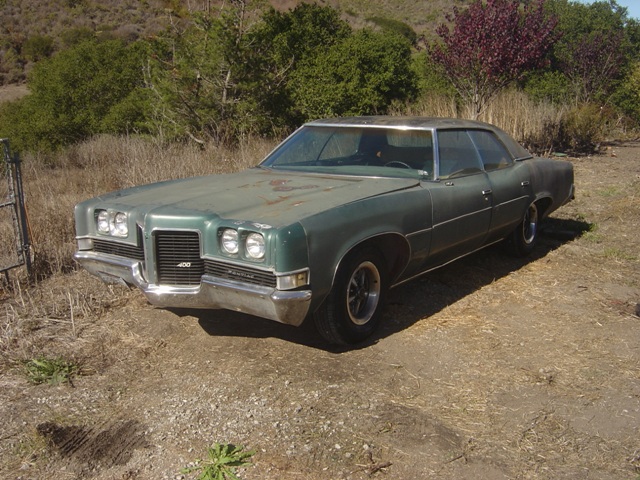
Since the car has new wheels, new radiator & cooling system, and is broken in, it's time to tune it up and get it ready for the road. This involves adjusting timing and getting all of the little knick knacks and doo dads installed and calibrated. But first things first, to finalize wheel install with anti-seize, new lugnuts, and torquing everything down properly.
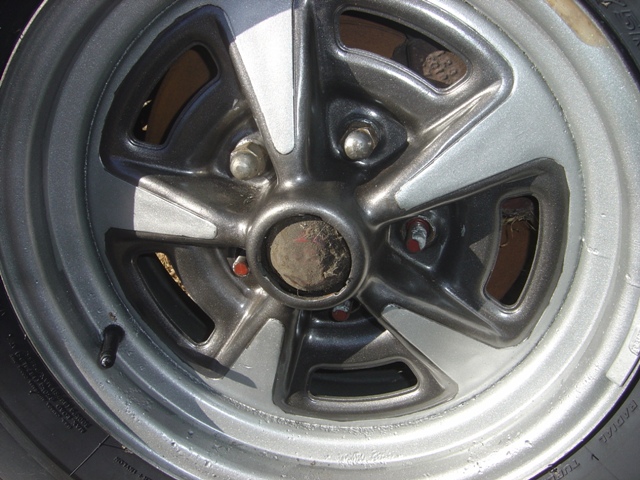
Anti-seize is your friend. Each wheel stud was given some to prevent issues with rusting lugnuts (and worse, BROKEN wheel studs).
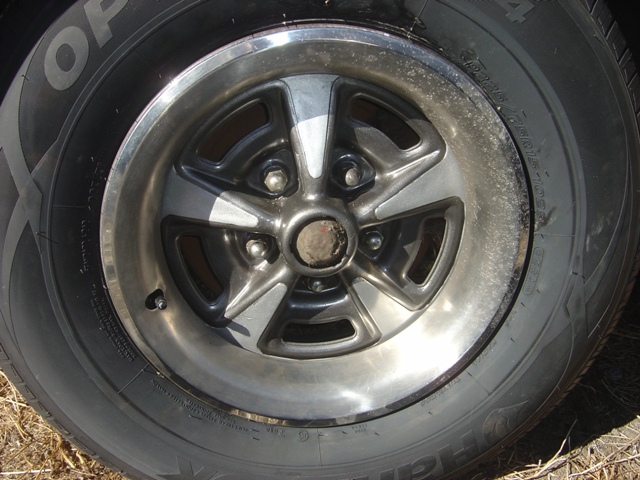
All torqued down and trim ring applied. Changes how the wheel looks on the car, gives it a very nice look.
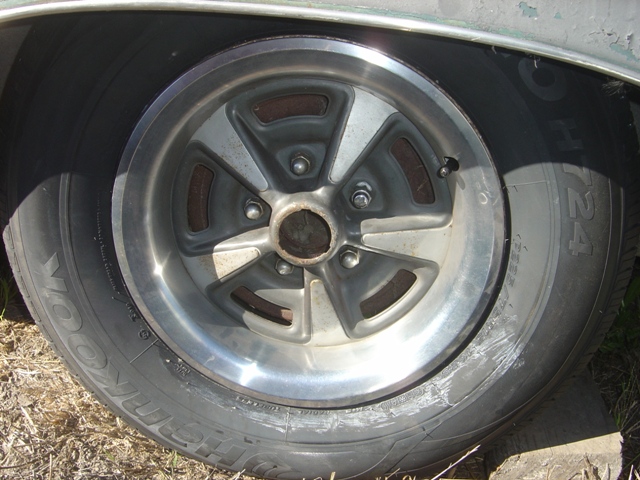
Back wheels are done too. Two of the trim rings refused to seat all the way on, not exactly sure why. They are about 3/8" off from fully seating and no amount of pushing and tweaking was making them go on. I'll sort it out later...
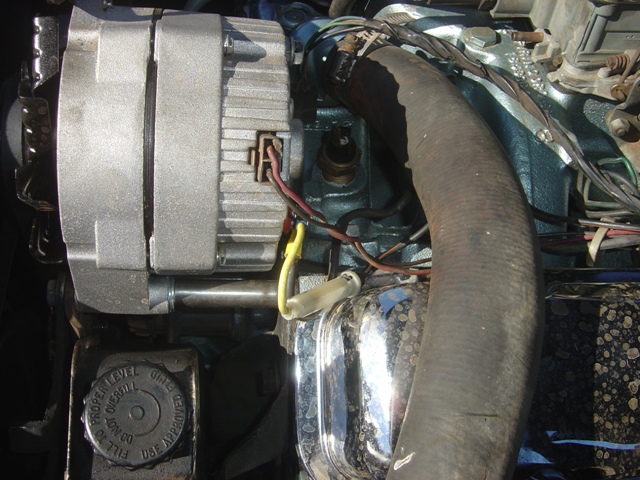
Electrical problems were sorted out. Namely that someone had chopped the harness where it connects to the alternator stud that provides power to the entire car. Without it being fixed the car would never charge. And I also added the 30A inline fuse to power the blower motor (it works!). Someone had at least unplugged it, just a matter of plugging the new one in to the existing orange\black wire connection.
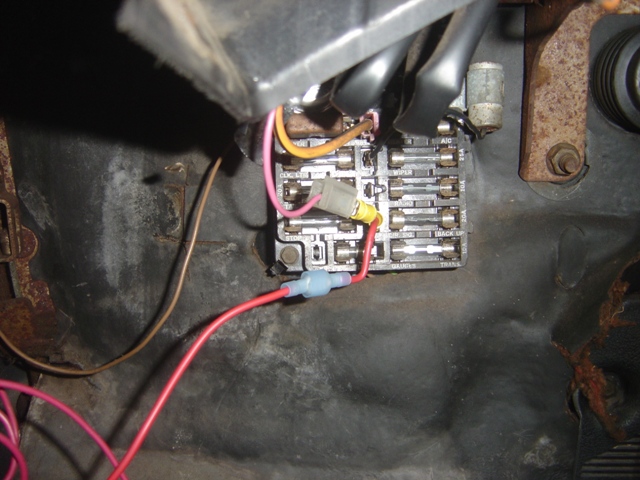
You'll remember the previous photo of blown fuses, wires unplugged, and foil applied liberally. Took all of that off, replaced the fuses, made a y-splitter for the IGN1 terminal to power the coil & power window relay, and hooked up the noise suppression capacitor to the BAT terminal. Power windows now all work! Well, all but the driver's side naturally. Probably just a dead motor. Gauges work too. Brake light doesn't go off and neither does the TEMP light. Pretty annoying, but I'll sort that out too.
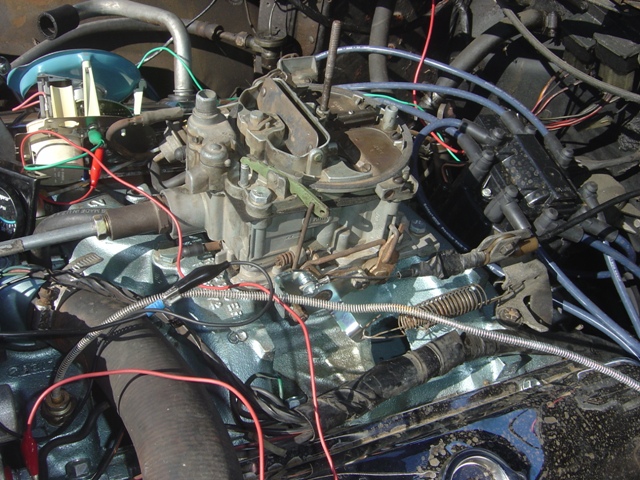
Fixed the throttle cable and carburetor throttle connection, now it functions as it should. Also have the timing light and a tachometer hooked up to make adjustments based on actual data rather than by ear.
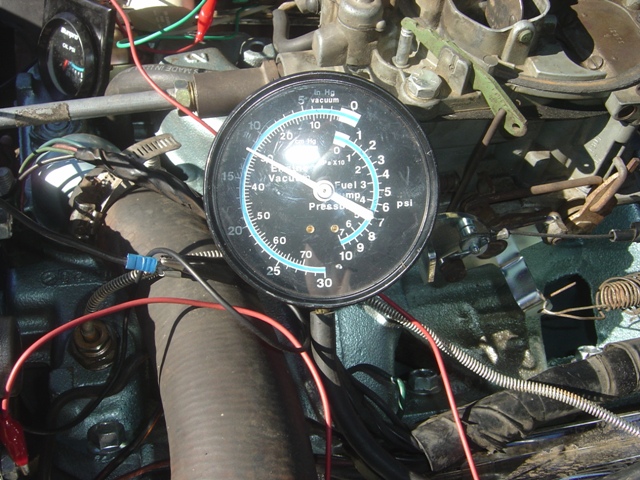
13-14" of vacuum at 750RPM. Not too bad for a cam of this size. Still enough to run power brakes and vacuum accessories. Amusingly enough, it started out running at 6" of vacuum and having trouble but still managing. Checked out the timing with the gun and found it was 16 degrees retarded. Oops. Adjusted the timing to 12 degrees BTDC and the engine picked up and idled SO much better than before. Vacuum gauge hits 21" when it's cruising so not too bad at all.

Everything hooked up and running. Transmission modulator line was MADE for this '71 carb, mounts up to it just perfectly despite being bent hideously. Hooked up power brakes and found that when you slam the brakes the car wants to die. No vacuum left in booster after car is turned off either, so the booster is bad and probably causing a vacuum leak making things perfrom a little worse than they should. Hooked up distributor vacuum advance to manifold vacuum and it provides ~14 degrees of advance (28 at the crank) and smoothed out the idle. Final idle adjustment is ~850RPM in gear and seems to be the sweet spot with that bad booster. Still a little blowby too, hopefully some spirited driving will take care of that. After all the engine was asleep for many years.
Have a video of it idling after tuning! 25psi of oil pressure at idle at 195 degrees after running for 45 minutes and fully warmed up is nothing to sneeze at and a good sign. It fluctuates slightly, but that could be from air in the line (of which there is a lot). Not worried since it is steady at off idle RPM.
And... OMG... it moved. Under it's own power! For the first time in over a decade! Not the belle of the ball as my old friend Steve would say, but definitely a respectable showing for a car long given up for dead. Next would be a drive down the road and run all out to see if the gears all shift like they should. And pray the brakes hold... Note how the ONLY window that doesn't go down is the driver's front side...
Have a video of it idling from the tailpipe perspective after driving around! Factory dual 2" exhaust goes into 3" tips just like one of them ol' redneck boys and their trucks. It's kind of annoying and I'll probably cut it off and get the Trans Am style splitters that aim towards the ground at an angle and really subdue the engine exhaust sound. No popping or strange noises, indicating everything seems to be nice and well adjusted. Not bad for doing this all by myself for the very first time without an experienced builder overseeing all of my mistakes - only having to rely on myself to catch the mistakes before they cause problems. And yes, there were quite a few!
Now we're back and resting after driving around for 30 minutes. Drove great. Got up to 55MPH on the short stretch of ranch road I allowed myself to go on. All 3 gears in forward shift firmly with no trouble (had to add 2 quarts to the tranny to get it to be happy). Reverses just like it should too. Slamming the brakes causes the car to die, so the booster will have to be replaced and the brakes bled to get proper stopping power. No funny noises or whines from the drivetrain, no smoke out the tail pipes either. Gas gauge worked too, a little sloshing around freed it up and it reads 1/4 of a tank (which makes sense). I'll bring another 5 gallons of 91 octane to top the tank off and after that the bad gas should be mostly gone.
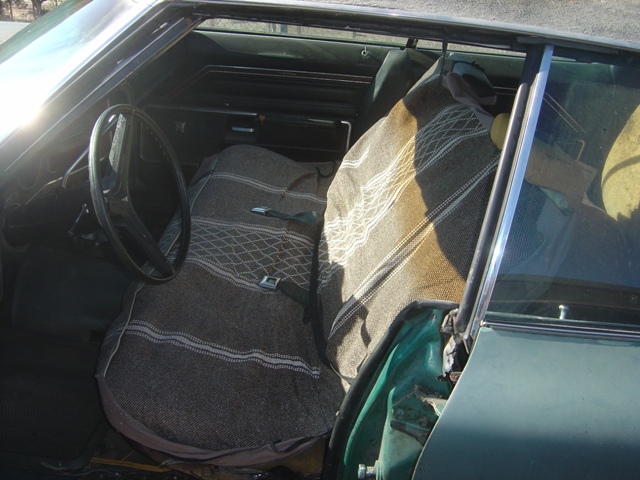
Not one to be undone or called "uncultured" in my attempts at bringing cars back to life, I decided to snazz up the beast a bit. The best way to do that would be to make the front seats all pretty and neat. I removed the annoying bench seat cover from my Suburban (worry not, it still has 2 underneath that one) and put it on the front bench seat. The headrests on this car allow the cover to stay in place unlike on the Suburban. It really jazzes up the car, don't you think?
What a day! Car is a runner AND a driver now. The darkside is strong with this one. Need to sort out the "brake booster vacuum causing engine to die" issue and bleed the brakes (which may necessitate new pads or calipers, but there is ample meat left on both sides when I checked). Once I do that, I'll add the rearview mirror, both side mirrors, and seat belts (the driver's side buckle failed) and it should be ready to drive down the mountain! I should probably register it and insure it before I do that though...
Return to 1971 Catalina
Last updated November 4th, 2012